The 7-Step Google Analytics Audit Framework (With Checklist)

Master your data with a thorough Google Analytics audit. Discover actionable insights to boost your website's performance. Read the full guide now!

Incorrect data leads to wrong decisions. Yet many businesses run their marketing on flawed analytics setups that miss conversions, misattribute revenue, and create costly blind spots.
A systematic Google Analytics audit isn't just a technical exercise—it's the foundation for making confident, data-driven decisions that directly impact your bottom line.
In this comprehensive guide, you'll discover:
- A step-by-step framework to verify your GA4 implementation and fix critical tracking issues
- Common analytics pitfalls that silently drain marketing budgets and how to fix them
- A 25-point checklist to ensure your data accurately reflects user behavior and revenue
TL;DR
- Verify tracking code implementation - Check GA4 code placement on all pages, inspect for duplicate codes, and validate proper installation in the header section with the correct format.
- Audit account structure and settings - Create three essential views (Raw, Test, Master), verify time zone and currency settings, and configure proper data retention policies.
- Implement proper data filters - Set up internal traffic exclusion, configure bot filtering, create hostname filters to prevent ghost spam, and exclude irrelevant URL parameters.
- Validate conversion tracking - Test all goal configurations, verify ecommerce tracking implementation with complete item data, and ensure form submissions and button clicks are properly tracked.
- Check cross-domain tracking - Verify proper configuration across domains, set up referral exclusion lists, and confirm payment gateway integrations.
- Review channel attribution - Audit UTM parameter consistency, check default channel grouping settings, and analyze multi-channel funnels.
- Optimize custom dimensions and metrics - Review implementation of custom dimensions, verify metric accuracy, and configure site search tracking.
A Step-by-Step Google Analytics Audit to Drive Results
Now that you understand why regular analytics audits are crucial, let's dive into our comprehensive 7-step framework. This methodical approach will help you identify and fix issues with your Google Analytics implementation.
Step 1: Verify Tracking Code Implementation
The foundation of accurate analytics is proper code implementation. Even small errors here can compromise your entire dataset.
Let's start with the basics:
- Check GA code presence on every page
- Confirm that your GA4 tracking code is present on every page of your website. Missing code on even a few pages can create significant blind spots in your data.
- Google Tag Assistant (Chrome extension)
- GA4 DebugView mode
- Screaming Frog SEO Spider (to crawl your site and check for GA code)
- Inspect for duplicate tracking codes
- Duplicate tracking codes can inflate your metrics and create data quality issues. This commonly happens when:
- Multiple teams add tracking independently.
- You’re transitioning from Universal Analytics to GA4.
- Your CMS has built-in GA integration, while you're also using Google Tag Manager.
- Use browser developer tools to search for multiple instances of "gtag" or "G-" in your page source.
- Duplicate tracking codes can inflate your metrics and create data quality issues. This commonly happens when:
- Verify correct code placement
- Your GA4 tracking code should be placed in the <head> section of your HTML. This ensures the code loads before users can interact with the page.
<head>
  <!-- Google tag (gtag.js) -->
  <script async src="https://www.googletagmanager.com/gtag/js?id=G-XXXXXXXXXX"></script>
  <script>
    window.dataLayer = window.dataLayer || [];
    function gtag(){dataLayer.push(arguments);}
    gtag('js', new Date());
    gtag('config', 'G-XXXXXXXXXX');
  </script>
</head>

- Validate tracking code format
Ensure your tracking code follows the correct format:
- For GA4: G-XXXXXXXXXX
- For Universal Analytics (legacy): UA-XXXXXX-X
Using the wrong format or mixing formats can cause tracking failures.
- Identify JavaScript errors affecting tracking
JavaScript errors can prevent your GA tracking from firing correctly. Use your browser's developer console to check for errors that might be interrupting the tracking code execution.
Step 2: Review Account Structure and Settings
A well-organized GA4 account structure is essential for meaningful analysis and data governance. Let's review the key components:
1. Audit Property and Stream Organization
In GA4, the hierarchy consists of:
- Account (top level)
- Property (website or app)
- Data Streams (web, iOS, Android)
Ensure your structure aligns with your business needs. For larger organizations with multiple brands or websites, separate properties often make sense. For smaller businesses, a single property with well-organized data streams is usually sufficient.
2. Create Essential Data Streams
While GA4 doesn't have "views" in the same way Universal Analytics did, you can still create similar data segmentation using data streams and filters:
- Raw Data Stream: Keep one unfiltered data stream that captures everything. This serves as your safety net if other filtered streams exclude important data.
- Test Data Stream: Create a testing environment where you can experiment with filters and custom definitions before implementing them in your main reporting.
- Master Data Stream: This is your primary reporting stream with all necessary filters applied (like internal traffic exclusion).
3. Verify Time Zone, Currency, and Default URL Settings
Check these critical settings:
- Time Zone: Ensure it matches your primary business location or reporting preference.
- Currency: Set to your primary business currency.
- Default URL: Confirm it matches your primary domain (with or without www, depending on your preference).
Incorrect settings here can cause reporting discrepancies, especially if you're comparing GA data with other tools.
4. Check Data Retention Settings and Privacy Controls
GA4's default data retention period is just 2 months for event data. For most businesses, this is insufficient. Navigate to:
Admin > Data Settings > Data Retention
Change this setting to the maximum available (currently 14 months) to ensure you can perform year-over-year comparisons.
Also, review your privacy controls to ensure compliance with regulations like GDPR and CCPA while still collecting the data you need.
5. Configure User Behavior Tracking Settings
GA4's enhanced measurement settings allow you to automatically track key user behaviors without additional code. Navigate to:
Admin > Data Streams > [Your Stream] > Enhanced Measurement
Verify that appropriate options are enabled based on your site's functionality:
- Page views
- Scrolls
- Outbound clicks
- Site search
- Video engagement
- File downloads
Step 3: Audit Data Collection Filters
Filters help ensure your analytics data is clean and relevant. Let's review the essential filters you should configure:
1. Set up filters to exclude internal traffic
Internal traffic can distort your analytics data, especially for smaller websites. To exclude it:
- Define internal traffic: Navigate to Admin > Data Streams > [Your Stream] > Configure tag settings > Show more > Define internal traffic. Create a rule to identify internal traffic, such as by IP address or a custom parameter like traffic_type=internal.
- Create a data filter: Go to Admin > Data Settings > Data Filters. Click Create Filter, select Internal Traffic, name the filter, choose Exclude, and set the filter state to Active.
2. Configure bot filtering options
GA4 automatically excludes traffic from known bots and spiders. This setting cannot be disabled or customized.
3. Create hostname filters to prevent ghost spam
Ghost spam can contaminate your data with fake referrals. To prevent this:
- Identify valid hostnames: Determine all legitimate hostnames where your tracking code should run (e.g., your main domain, subdomains, development environments).
- Create a custom dimension for hostnames: Navigate to Admin > Custom Definitions > Create Custom Dimension. Set the dimension name to "Hostname" and the scope to "Event".
- Create a filter: Go to Admin > Data Settings > Data Filters. Click Create Filter, select Custom Filter, and set it to include only traffic from the valid hostnames identified earlier.
4. Implement search and replace filters for consistency
These filters help standardize your data by:
- Converting all URLs to lowercase
- Removing query parameters that don't add analytical value
- Standardizing campaign parameter formats
5. Review and exclude unnecessary URL parameters
Query parameters that don't impact the user experience or page content can fragment your page reports. In GA4:
- Go to: Admin > Data Settings > Data Collection
- Under "Query Parameter Exclusion", add parameters to exclude (e.g., utm_source, fbclid, gclid).
This helps maintain clean and consistent data in your reports.
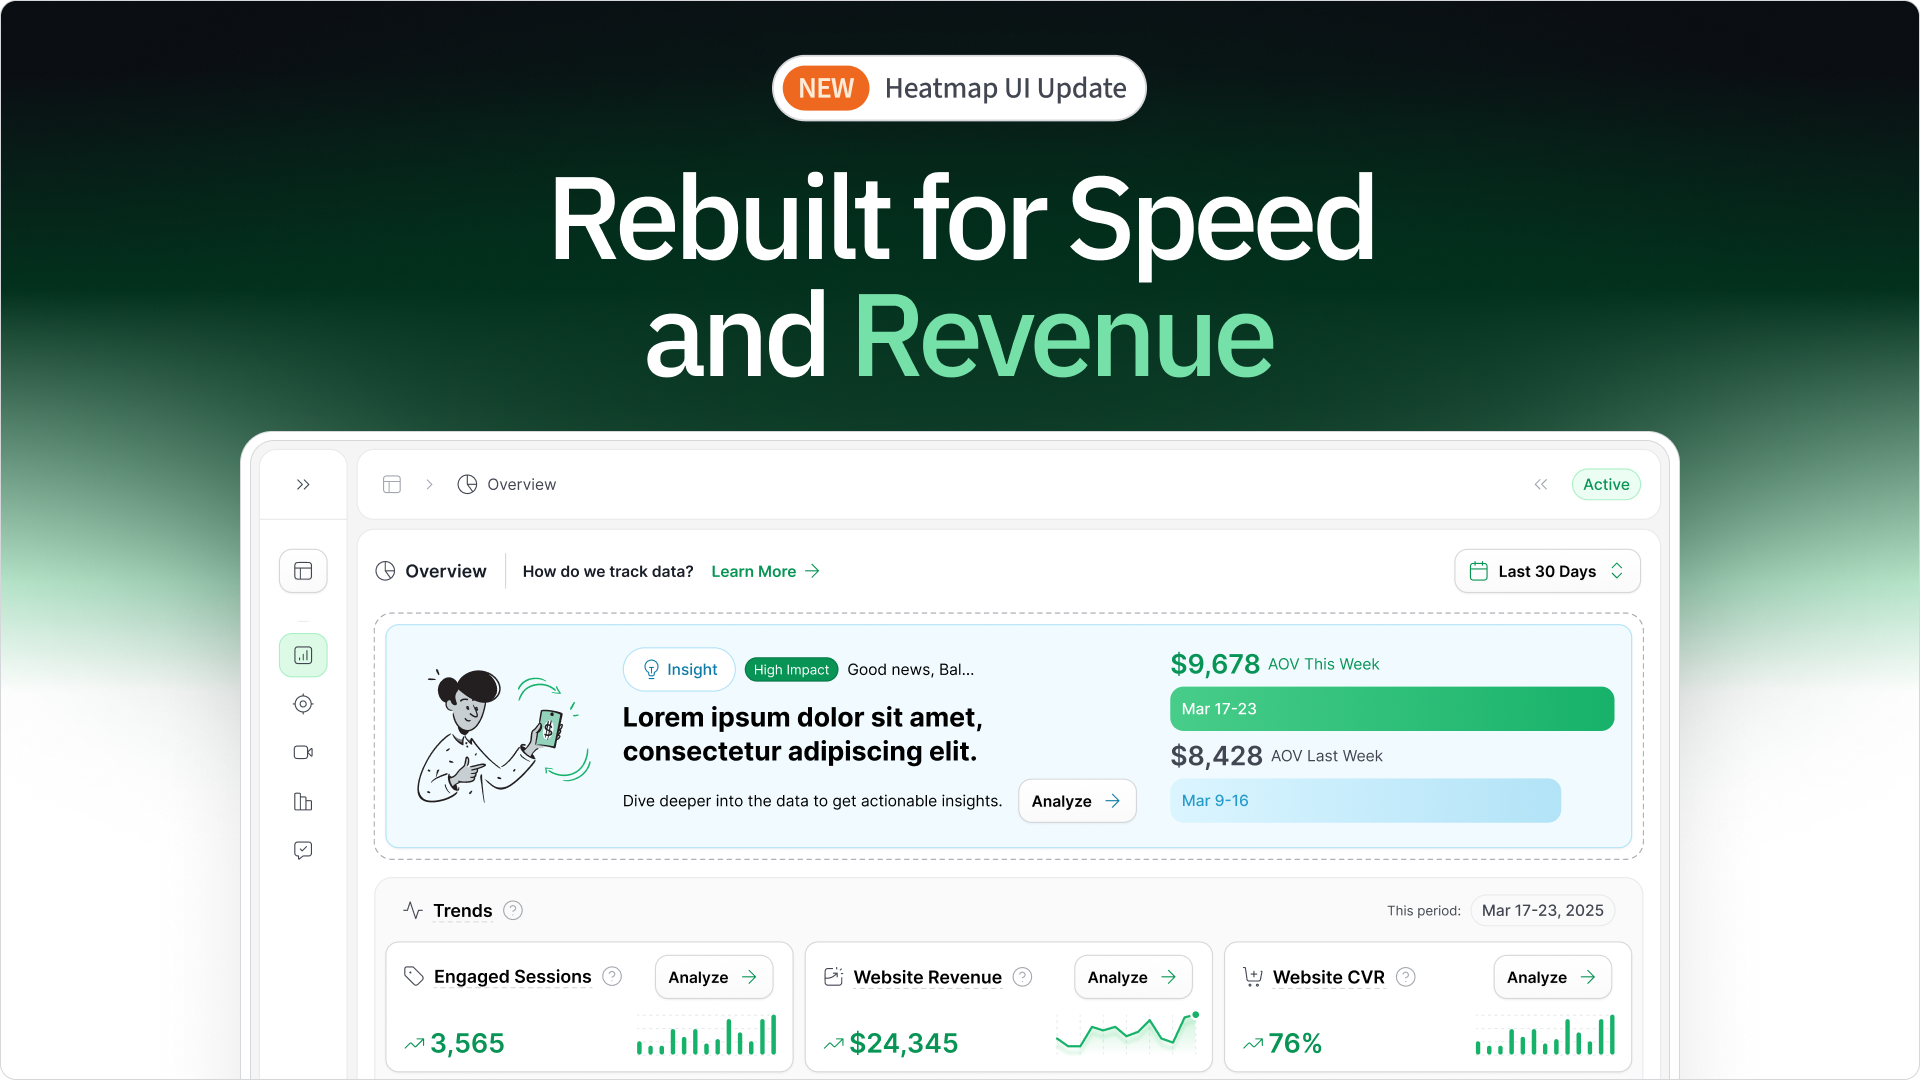
HeatmapAI's filtering capabilities allow segmentation by average order value and traffic source, providing more granular insights than standard GA filters. This enables you to see how different user segments interact with your site and which elements drive the most value for high-AOV customers.
Step 4: Validate Conversion Tracking and Goals
Accurate conversion tracking is perhaps the most critical aspect of your analytics setup. Let's ensure it's working properly:
1. Test all goal configurations
For each goal or conversion event in GA4:
- Trigger the conversion yourself: Use an incognito browser window to perform the conversion action (e.g., complete a purchase, submit a form).
- Check DebugView in GA4: Navigate to Admin > DebugView and confirm that the event fired correctly.
- Verify parameters: Ensure that all necessary parameters are being passed with the event, such as transaction_id, value, currency, and items for eCommerce transactions.
2. Verify eCommerce tracking implementation
For eCommerce sites, proper transaction tracking is essential:
- Complete a test purchase: Use a coupon code for 100% off if needed.
- Verify purchase event parameters: Ensure the purchase event includes all required parameters:
- transaction_id
- value
- currency
- items array with product details
- Check consistency across events: Ensure that product data is consistent across all ecommerce events (view_item, add_to_cart, purchase).
3. Check event tracking setup
Beyond conversions, verify that important user interactions are being tracked:
- Form submissions: Ensure that form submission events fire only on successful submissions, not on validation errors.
- Button clicks: Ensure that click events have descriptive names and capture button text or purpose as parameters.
- Other interactions: Verify tracking for video plays, file downloads, and scroll depth.
4. Confirm form submission and button click tracking
Form submissions and button clicks are often critical conversion points. Verify that:
- Form submissions: Events fire only on successful submissions, not on validation errors.
- Button clicks: Click events have descriptive names and capture button text or purpose as parameters.
5. Align goals with actual business KPIs
Finally, review your conversion events to ensure they align with your business objectives. Common misalignments include:
- Tracking micro-conversions: Focusing on actions like newsletter signups while missing macro-conversions like purchases.
- Failing to distinguish lead quality: Not differentiating between high-quality and low-quality leads.
- Neglecting post-conversion actions: Not tracking actions that indicate customer satisfaction or retention.
By ensuring your conversion tracking is accurately configured and aligned with your business goals, you can obtain meaningful insights to drive informed decisions.
Step 5: Cross-Domain Tracking and Referral Management
If your user journey spans multiple domains (like from your main site to a booking system or payment processor), proper cross-domain tracking is essential.
1. Verify cross-domain tracking configuration
For GA4, cross-domain tracking requires:
- Adding all domains to the same data stream: Ensure that the data stream used for tracking spans all domains involved in the user journey.
- Configuring the linker parameter to pass the client ID between domains: This step ensures a seamless user experience as they navigate between domains without losing their session information.
To configure it, use the following code:
2. Set up proper referral exclusion list
When users navigate between your domains, you don't want these transitions to appear as new referral sessions. To configure your referral exclusion list:
- Go to Admin > Data Streams > [Your Stream] > Configure tag settings.
- Under "List unwanted referrals", add all domains that are part of your user journey. This ensures that users transitioning between these domains are not tracked as new referrals.
3. Check self-referral issues
Self-referrals occur when your own domain appears as a traffic source. This usually indicates problems with:
- Cross-domain tracking configuration: If not set up correctly, users who should be tracked across domains may cause self-referrals.
- Session timeouts: If a session times out during a cross-domain transition, it might generate a new session and cause self-referrals.
- Redirects that break the tracking cookie: Improper redirects can reset or break the tracking cookie, resulting in self-referrals.
To identify self-referrals:
- Go to Reports > Acquisition > Traffic acquisition.
- Look for your own domain in the list of referrers.
4. Confirm payment gateway and third-party integrations
Payment gateways and third-party tools can disrupt your tracking if not properly configured:
- Test the complete checkout process: Ensure that the client ID is maintained across the entire user journey, from the main site to the payment gateway and back.
- Verify conversions: Confirm that conversions are attributed to the original source, not the payment gateway, by checking if the transaction tracking continues from the original session and not from the payment page.
Step 6: Channel Attribution Review
Accurate channel attribution ensures you know which marketing efforts are driving results.
UTM parameters are essential for tracking campaign performance. Ensure:
- Consistent naming conventions: Use a standardized naming structure across all campaigns to maintain consistency.
- Proper case sensitivity: GA4 treats "Campaign" and "campaign" as different values; always use lowercase letters to avoid discrepancies.
- Complete parameter sets: At a minimum, include utm_source, utm_medium, and utm_campaign in your URLs.
Common UTM issues include inconsistent capitalization (e.g., facebook vs. Facebook), mixing naming conventions (e.g., email vs. email-newsletter), and missing parameters that cause traffic to be misattributed.
2. Check default channel grouping settings
GA4's default channel grouping may not align with your marketing strategy. Review:
- How your traffic sources are being categorized: Ensure that traffic is grouped correctly according to your marketing channels.
- Whether paid and organic traffic are properly distinguished: Verify that paid and organic traffic are not conflated.
- If social media platforms are correctly identified: Check that social media traffic is categorized appropriately.
Consider creating custom channel groupings if the defaults don't meet your needs.
3. Verify campaign tagging practices
Review your campaign tagging implementation:
- Are all paid campaigns properly tagged? Ensure that all paid campaigns have the appropriate UTM parameters.
- Are email campaigns consistently tagged? Verify that email campaigns are tagged uniformly.
- Are social media posts tagged appropriately? Check that social media posts include the correct UTM parameters.
Create a campaign tagging guideline document to ensure consistency across your team.
4. Review attribution models
GA4 offers several attribution models:
- Last click: Attributes 100% of the conversion credit to the last touchpoint.
- First click: Gives all credit to the first touchpoint.
- Linear: Distributes credit equally across all touchpoints.
- Position-based: Allocates 40% of credit to both the first and last touchpoints, with the remaining 20% distributed evenly among the middle interactions.
- Time decay: Gives more credit to touchpoints closer in time to the conversion.
- Data-driven: Uses machine learning to assign credit based on the actual contribution of each touchpoint.
The default last-click model may not reflect your customer journey. Consider which model best represents how your customers convert.
5. Analyze multi-channel funnels
Use GA4's Advertising workspace to examine how different channels work together:
- Look for channels that initiate customer journeys but don't get credit in last-click models: Identify touchpoints that introduce users but aren't credited for conversions.
- Identify assist channels that support conversions: Determine which channels assist in driving conversions.
- Determine the typical path length to conversion: Understand the average number of interactions before a conversion occurs.
heatmapAI's revenue-based heatmaps can identify which specific page elements drive conversions, going beyond GA's page-level attribution. By showing exactly which buttons, images, or content sections generate the most revenue, you can optimize at a much more granular level than standard analytics allows.

Step 7: Custom Dimensions, Metrics, and Advanced Features
Custom dimensions and metrics allow you to track data specific to your business needs.
1. Review custom dimension implementation
Ensure your custom dimensions:
- Are properly registered in GA4: Navigate to Admin > Custom Definitions > Custom Dimensions to verify registration.
- Contain the expected values: Use the DebugView in GA4 to check real-time data and ensure values are being captured correctly.
- Have appropriate scopes: Assign scopes based on the data's relevance—user, event, or item.
Common custom dimensions include:
- User type (logged in vs guest)
- Customer segment
- Content category
- Product type
2. Verify custom metrics accuracy
For custom metrics, verify:
- Calculation logic is correct: Ensure formulas or methods used to derive metrics are accurate.
- Units are consistent: Standardize units across metrics for uniformity.
- Values fall within expected ranges: Regularly monitor metrics to identify any anomalies or outliers.
Examples of useful custom metrics include:
- Average order gap (days between purchases)
- Customer lifetime value
- Form completion time
- Engagement score
3. Check content grouping setup
Content groupings help organize your pages for more meaningful analysis:
- Review your content grouping strategy: Align groupings with business objectives and user behavior.
- Verify that all pages are correctly categorized: Regularly audit pages to ensure they are assigned to the appropriate groups.
- Check that new pages are automatically assigned to appropriate groups: Implement automated rules or processes to handle new content.
4. Audit enhanced eCommerce features
For eCommerce sites, verify that enhanced measurement captures the complete shopping journey:
- Product impressions: Track when products are viewed by users.
- Product clicks: Monitor when users click on product listings.
- Add to cart actions: Capture when items are added to the shopping cart
- Checkout steps: Record each stage of the checkout process.
- Purchases: Ensure successful transactions are tracked.
- Refunds: Monitor returned items or canceled orders.
5. Configure site search tracking
If your site has a search function:
- Verify that site search tracking is enabled: In GA4, go to Admin > Data Streams > [Your Stream] > Enhanced Measurement and ensure Site search is turned on.
- Confirm the query parameter is correctly identified: Typically, it's "q" or "search"; ensure your site's query parameter matches.
- Check that search terms are being captured accurately: Use the DebugView to test and confirm data collection.
6. Implement rage click tracking
Rage clicks (rapid, frustrated clicking) indicate user experience issues.
P.S. heatmapAI's rage click tracking can identify these pain points automatically, showing you exactly where users are getting stuck or frustrated on your site.

Google Analytics Audit Checklist: 25 Essential Items
To make your audit process more manageable, here's a comprehensive checklist covering all critical aspects of your Google Analytics setup:
Use this checklist quarterly to ensure your analytics implementation remains accurate and effective as your website evolves.
Universal Analytics vs. GA4 Audit Differences
If you're transitioning from Universal Analytics to GA4 or maintaining both, understanding the key differences is crucial for a successful audit.
Key Configuration Differences
- Event Tracking Model Changes: UA employs a category/action/label structure for events, whereas GA4 uses a parameter-based approach.
- Property Setup Variations: GA4 replaces views with data streams and introduces a new measurement ID format (G-XXXXXXXXXX).
- Different Default Reports and Metrics: GA4 replaces "bounce rate" with "engagement rate" and calculates sessions differently.
- Enhanced Measurement Capabilities in GA4: GA4 automatically tracks events like scrolls, outbound clicks, site search, video engagement, and file downloads.
- BigQuery Integration Options: GA4 offers free BigQuery export capabilities, whereas UA's BigQuery integration was limited to GA360 users.
Migration Audit Considerations
- Parallel Tracking Implementation: Run both UA and GA4 simultaneously for at least 3-6 months to compare key metrics and identify gaps.
- Historical Data Preservation Strategies: Export critical UA reports before the sunset date and consider using BigQuery for long-term data storage.
- Custom Dimension and Metric Mapping: Document and verify that all custom data is being collected in GA4 with appropriate scopes.
- Event Tracking Translation: Systematically convert UA events to GA4, ensuring each event is properly configured and tested.
- Goal Conversion Reconfiguration: Recreate destination goals as page_view events in GA4 and implement engagement goals as needed.
GA4-Specific Audit Items
- Enhanced Measurement Verification: Ensure that enhanced measurement is properly configured and test each automatic event to confirm it's firing correctly.
- Event Parameter Consistency: Establish a parameter naming convention and document expected parameters for each event to ensure consistency.
- E-commerce Event Implementation: Verify that GA4's e-commerce events (e.g., view_item, add_to_cart, purchase) are implemented with all required parameters.
- Audience Definitions: Review audience definitions against business requirements, verify that audience triggers are firing correctly, and confirm audiences are populating as expected.
- Data Stream Configuration: Audit each data stream to ensure correct measurement IDs, proper configuration, and cross-platform tracking functionality.
- Explore Reports Setup: Check custom explorations to ensure reports include relevant dimensions and metrics, segments are properly defined, and visualizations effectively communicate insights.
Common Google Analytics Issues and How to Fix Them
During your audit, you're likely to encounter several common issues in Google Analytics. Here's how to identify and resolve them:
Self-Referral Problems
Self-referrals occur when your own domain appears as a traffic source, disrupting proper attribution.
Implementation example for proper cross-domain tracking:
Duplicate Transactions
Duplicate transactions artificially inflate your revenue data and conversion counts.
Example code to prevent duplicate transaction tracking:
if (!localStorage.getItem('transaction_' + transactionId)) {
// Record the transaction
gtag('event', 'purchase', {
transaction_id: transactionId,
value: orderTotal,
currency: 'USD',
items: cartItems
});
// Mark this transaction as processed
localStorage.setItem('transaction_' + transactionId, 'processed');
}
Missing or Incomplete Data
Data gaps can severely impact your analysis and decision-making.
Inflated Bounce Rates
Unusually high bounce rates often indicate tracking issues rather than actual user behavior problems.
Example code for adjusted bounce rate in GA4:
setTimeout(function() {
gtag('event', 'engagement', {
'method': 'time_on_page',
'value': '30_seconds'
});
}, 30000);
GA4 Tells You "What's Happening" - Heatmap's Behavioral Analytics Share the "WHY"
Google Analytics 4 provides powerful quantitative data about your website performance, but it has inherent limitations when it comes to understanding the "why" behind user behavior. Even after a perfect audit implementation, GA4 leaves critical blind spots in your analytics strategy.
See Exactly How Every Element Impacts Revenue
Standard analytics tells you which pages convert—behavioral analytics shows you precisely which elements make money.
heatmapAI's revenue-based heatmaps tie actual revenue to every click on your site:
- Identify your highest-value page elements by seeing exactly which buttons, images, and content sections drive the most revenue—not just clicks. This reveals optimization opportunities that remain completely invisible in standard GA4 reports.

- Make design decisions based on revenue data, not just engagement metrics. heatmapAI shows you exactly which elements contribute most to your bottom line, allowing you to prioritize changes that will have the greatest financial impact.
- Analyze user behavior by revenue segments using custom filters that let you compare high vs. low AOV customers, purchasers vs. non-purchasers, and traffic from different sources. This reveals how your most valuable customers interact with your site differently.
Discover Hidden Conversion Blockers
heatmapAI helps you identify and fix the friction points that GA4 can't reveal:
- Pinpoint user frustration with rage click analysis that shows exactly where users are getting stuck. This highlights non-functional elements or confusing interactions that might be driving visitors away.
- Identify JavaScript errors affecting conversions with AI-powered tracking that automatically detects issues impacting site performance. This helps you prioritize technical fixes based on their actual impact on user experience.
- See where users stop scrolling with interactive scrollmaps that reveal content engagement patterns and revenue drop-off points. In Obvi's case study, they discovered critical CTA elements were positioned below the average fold line, limiting visibility and conversions.

Segment Your Highest-Value Customers for Targeted Optimization

Standard analytics treats all users equally—but not all users contribute equally to your revenue. HeatmapAI's advanced filtering capabilities let you:
- Compare high vs. low AOV customers to see how their behavior differs. Optimize specifically for your most valuable segments by understanding exactly how they navigate your site.
- Analyze purchasers vs. non-purchasers to identify the specific elements and behaviors that lead to conversions.
- Filter by traffic source to optimize landing pages for specific channels. Create tailored experiences for users coming from different marketing campaigns based on their unique behavior patterns.
Implement Data-Driven Optimizations
heatmapAI doesn't just identify issues—it provides actionable recommendations to fix them:
- Get AI-powered optimization suggestions from a library of over 500 recommendations designed to enhance copy, improve layouts, and optimize page elements for increased revenue per session.

- Optimize site performance with built-in speed tracking to improve load times and enhance user experience.
- Test with confidence: heatmapAI seamlessly integrates with top A/B testing tools like Intelligems, Visually, Convert, and Shoplift, allowing brands to supercharge their split-testing strategies
Real Results from Real Businesses
HeatmapAI's insights have delivered measurable revenue improvements for ecommerce brands:
- Obvi increased revenue per session by 7.81% by implementing a single heatmapAI recommendation to move their CTA button above the fold. This simple change also boosted their conversion rate by 4.69%, allowing them to scale while maintaining profitability.

- JellyBee achieved a 24.7% conversion rate increase after using heatmapAI's recommendation to add a human element to their hero image. This change led to a 14.4% increase in revenue per session and a 31% boost in ROAS, generating over $650,000 in additional annual revenue.

- That Works Agency increased revenue per session by 13.07% by optimizing filter visibility based on heatmapAI's scroll-depth analysis and revenue tracking. The change also improved conversion rates by 4.22% and increased average basket size by 14.19%.

Go Beyond the Basic: Unlock Revenue-Boosting Insights with heatmapAI
Now that you’ve completed your Google Analytics audit, you're on the right path to better data accuracy. But why stop there? heatmapAI takes your insights to the next level.
With heatmapAI, you can optimize your site for revenue growth, not just traffic. It’s the smart, efficient way to turn insights into action—no endless report digging required. Start making data-driven decisions today and see the impact on your bottom line!
You made it all the way down there? Give Heatmap a try 🤝
We are the only onsite analytics platform that tells you how to make more money - down to the pixel. Trusted by 1000+ eCommerce brands.

Ashvin Melwani
@ashvinmelwaniWith heatmap, I've been able to figure out what elements actually increase AOV and optimize our landing pages to drive more first purchase profitability, we're up 23% YoY.

How You Can Do It:
1: Download heatmap
2: Wait for 5k sessions
3: Reorganize products based on the highest revenue per session from top left to bottom right.

Founder of heatmap, SplitTesting.com, and multiple ecommerce brands. Lifelong optimizer, CRO-lover, and data nerd.


You made it all the way down here?
Might as well give us a shot, right? It'll change the way you approach CRO. We promise. In fact, our friend Nate over at Original Grain used element-level revenue data from heatmap to identify high-impact areas of his website to test, resulting in a 17% lift in Revenue per Session while scaling site traffic by 43%. Be like Nate. Try heatmap today.
